I am sewing kids’ raincoats for my sons. I made muslins for their two sizes using Madalynne’s Blog on how to draft a front and back bodice sloper. (I love her blog.) Then I used a hood from a pattern that I already had. The pattern was for an adult, so in order to fit the hood to my bodice, I had to measure the collar length and make some slight modifications.

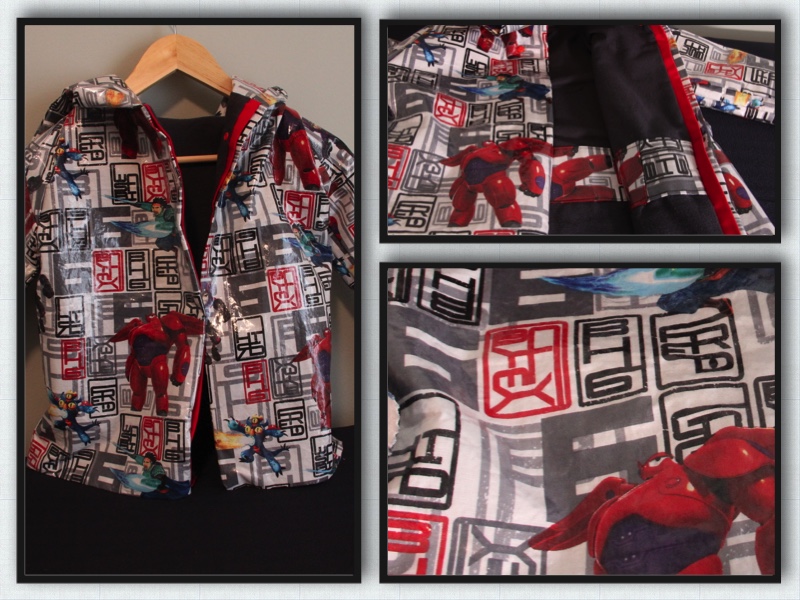
Now moving on to fabric selection. I was looking for my fabric choice to look masculine, not macho masculine, but juvenile masculine, and have a matching lining, and be waterproof. I considered using laminated cotton, PUL, or iron-on vinyl on my own selected fabric. Well, my boys love Big Hero 6, and I found some BH6 cotton fabric, which means I would have to laminate the fabric myself, so instead, I selected the PUL, because it is waterproof.
Bad Choice!!! The PUL was waterproof, but it was not stiff enough. It was almost like a laminated knit. Worst of all, the laminate was on the back side of the fabric, not the front. This may be useful for some other projects like diapers, but for my raincoats, it was a no go.
Soo…. I went back to Fabric.com and ordered the BH6 cotton, and fusible laminate.
I applied laminate to the Big Hero 6 fabric (with an iron) and it turned out pretty nicely. I applied the laminate before cutting. Then I outlined my pieces on the fabric. Luckily, each garment piece fit within the width of laminate that I needed. The laminate was on a roll of 24″ width. 
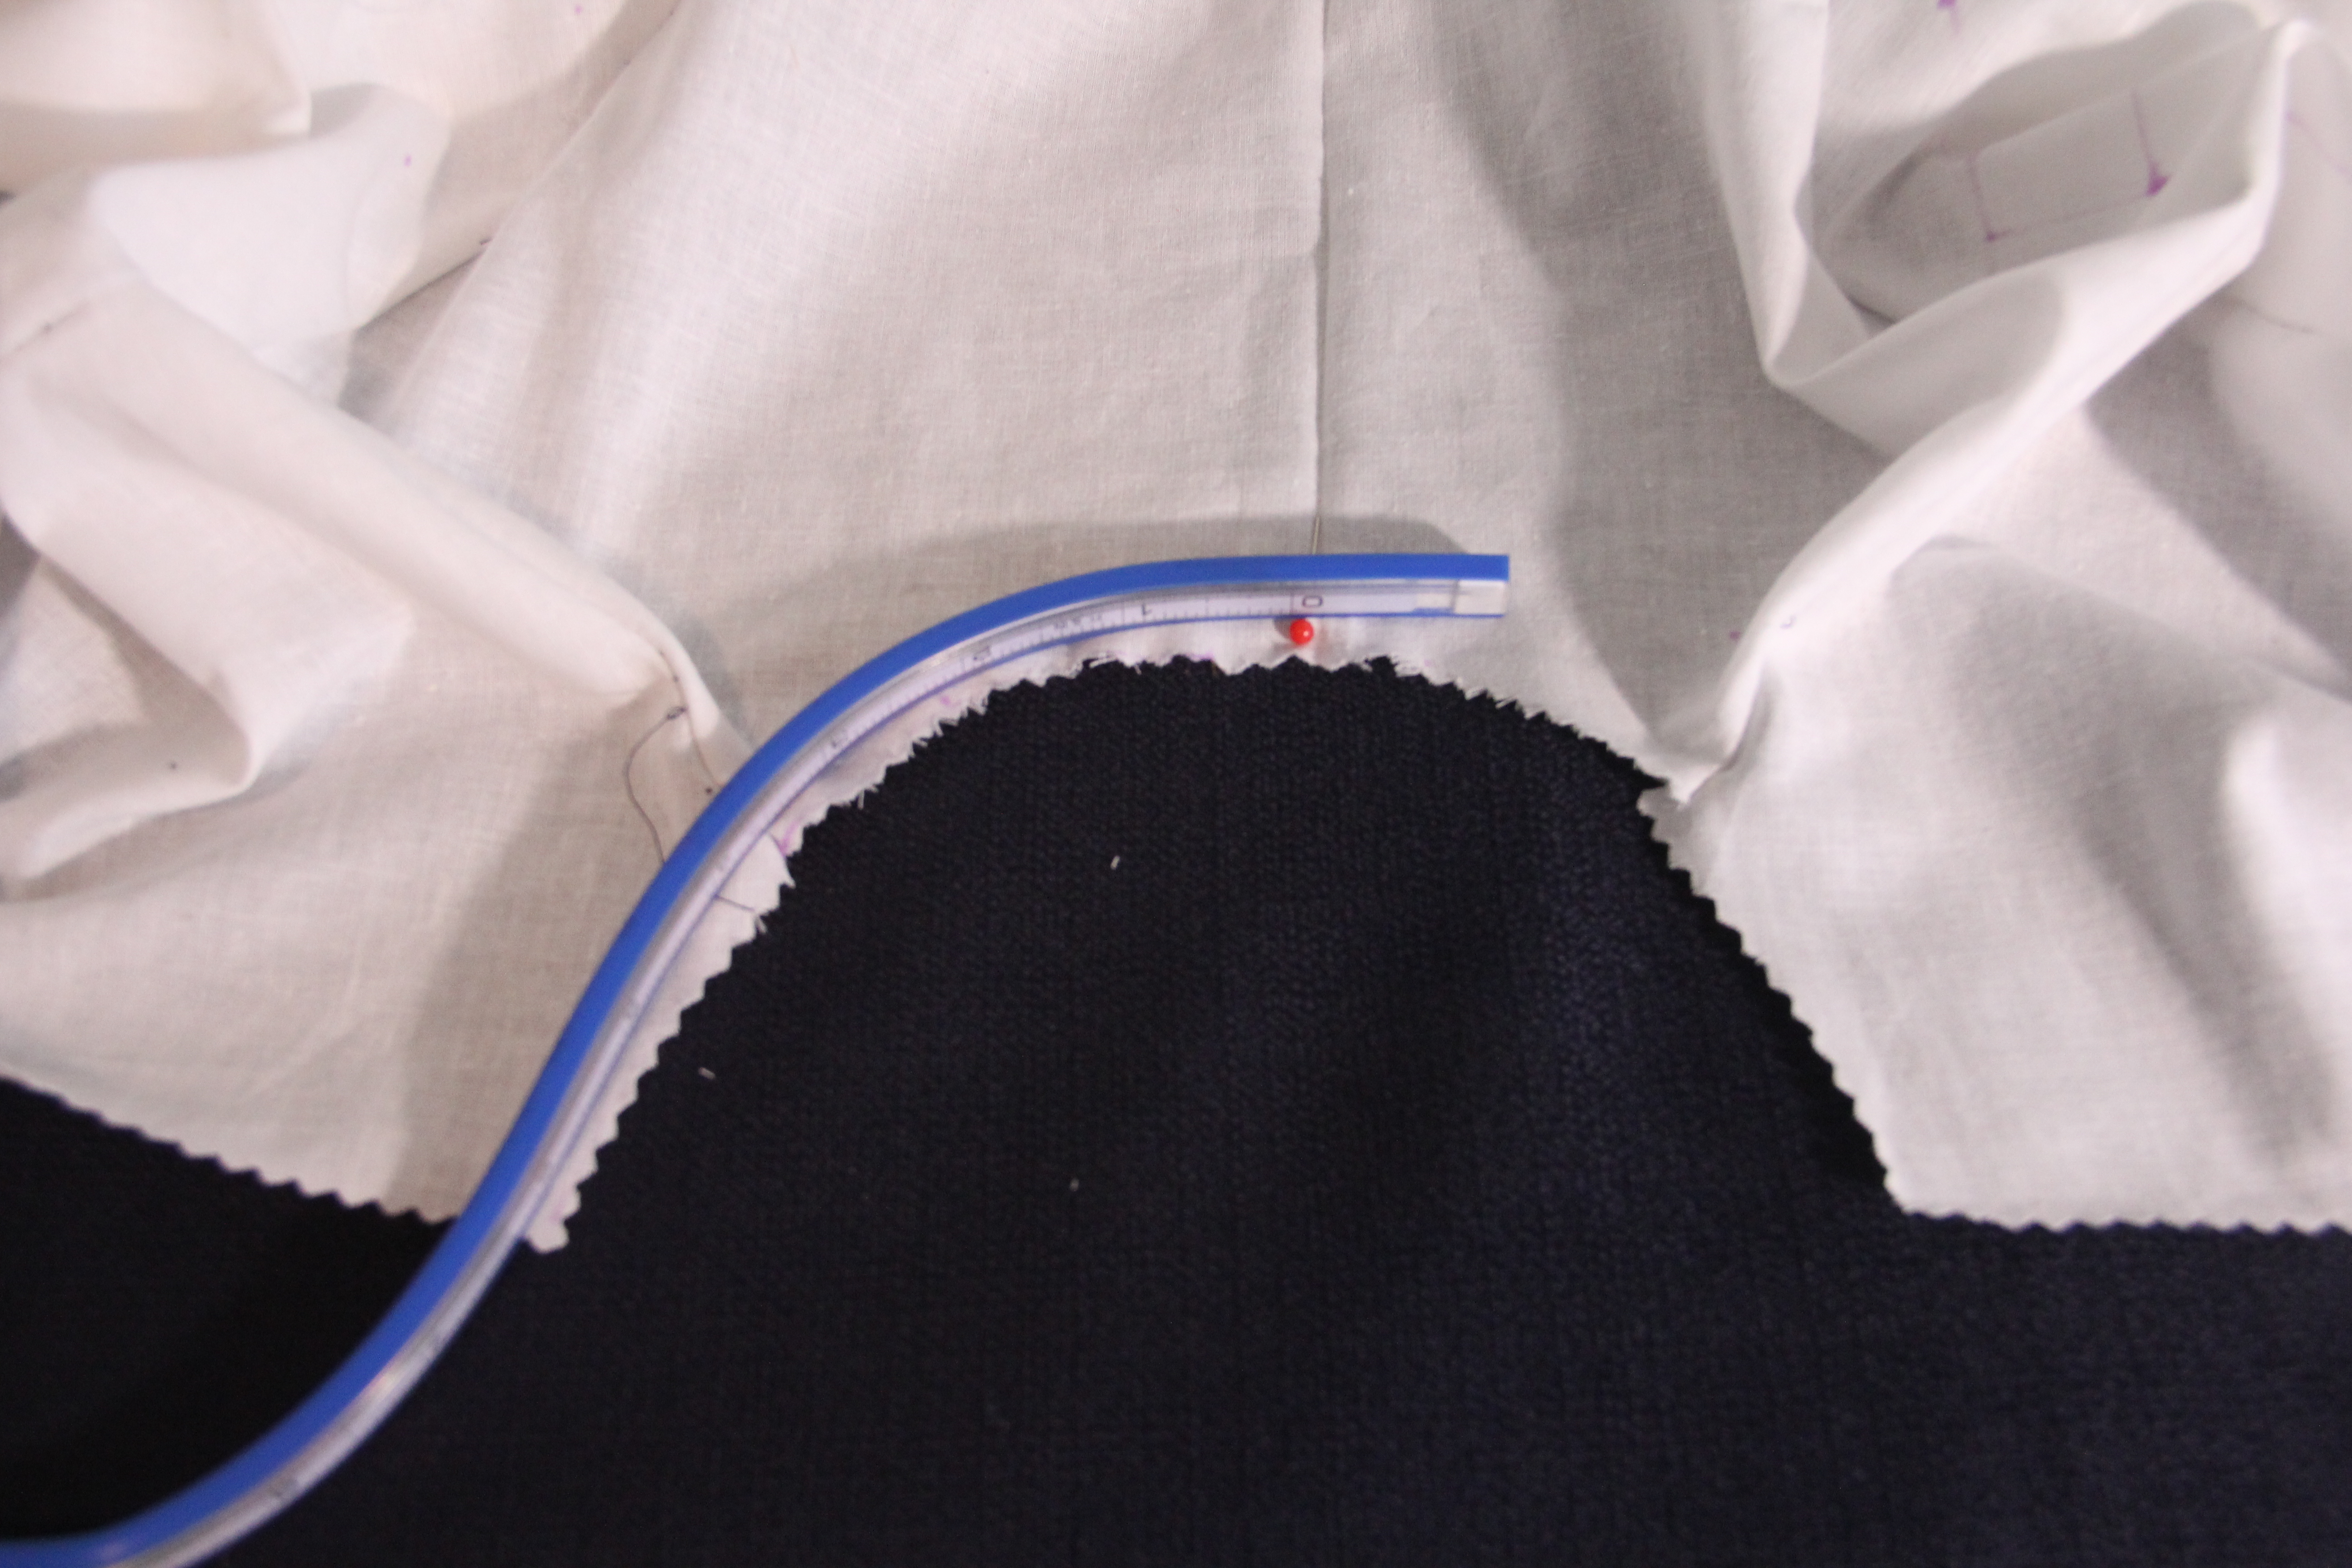
Sewing the laminate cotton was easy. Since I was sewing everything right side together, I was sewing with on the cotton side with the laminate face down. I did have a problem with the sleeves, but I always have a problem with the sleeves. When I designed my sloper, I made the circumference of my armholes match the length of my sleeve cap. Even still, since the laminated fabric is so crispy, it was difficult sewing in the sleeves. At first, I didn’t pin the sleeves because I didn’t want to leave holes in the seam allowance, but after a sloppy result, I decided to use the pins in the seam allowance. The holes were barely noticeable.
The fabric took a lot of abuse from sewing in the sleeves, and started looking kind of “plasticky”. So I ironed over the laminate again. You can’t place the iron directly on the laminate, but when applying it, you take the sheet that it was adhered to , it is kind of like wax paper, and put it over the laminate fabric, then you can iron it.
Well here is the end result.
 <>
<>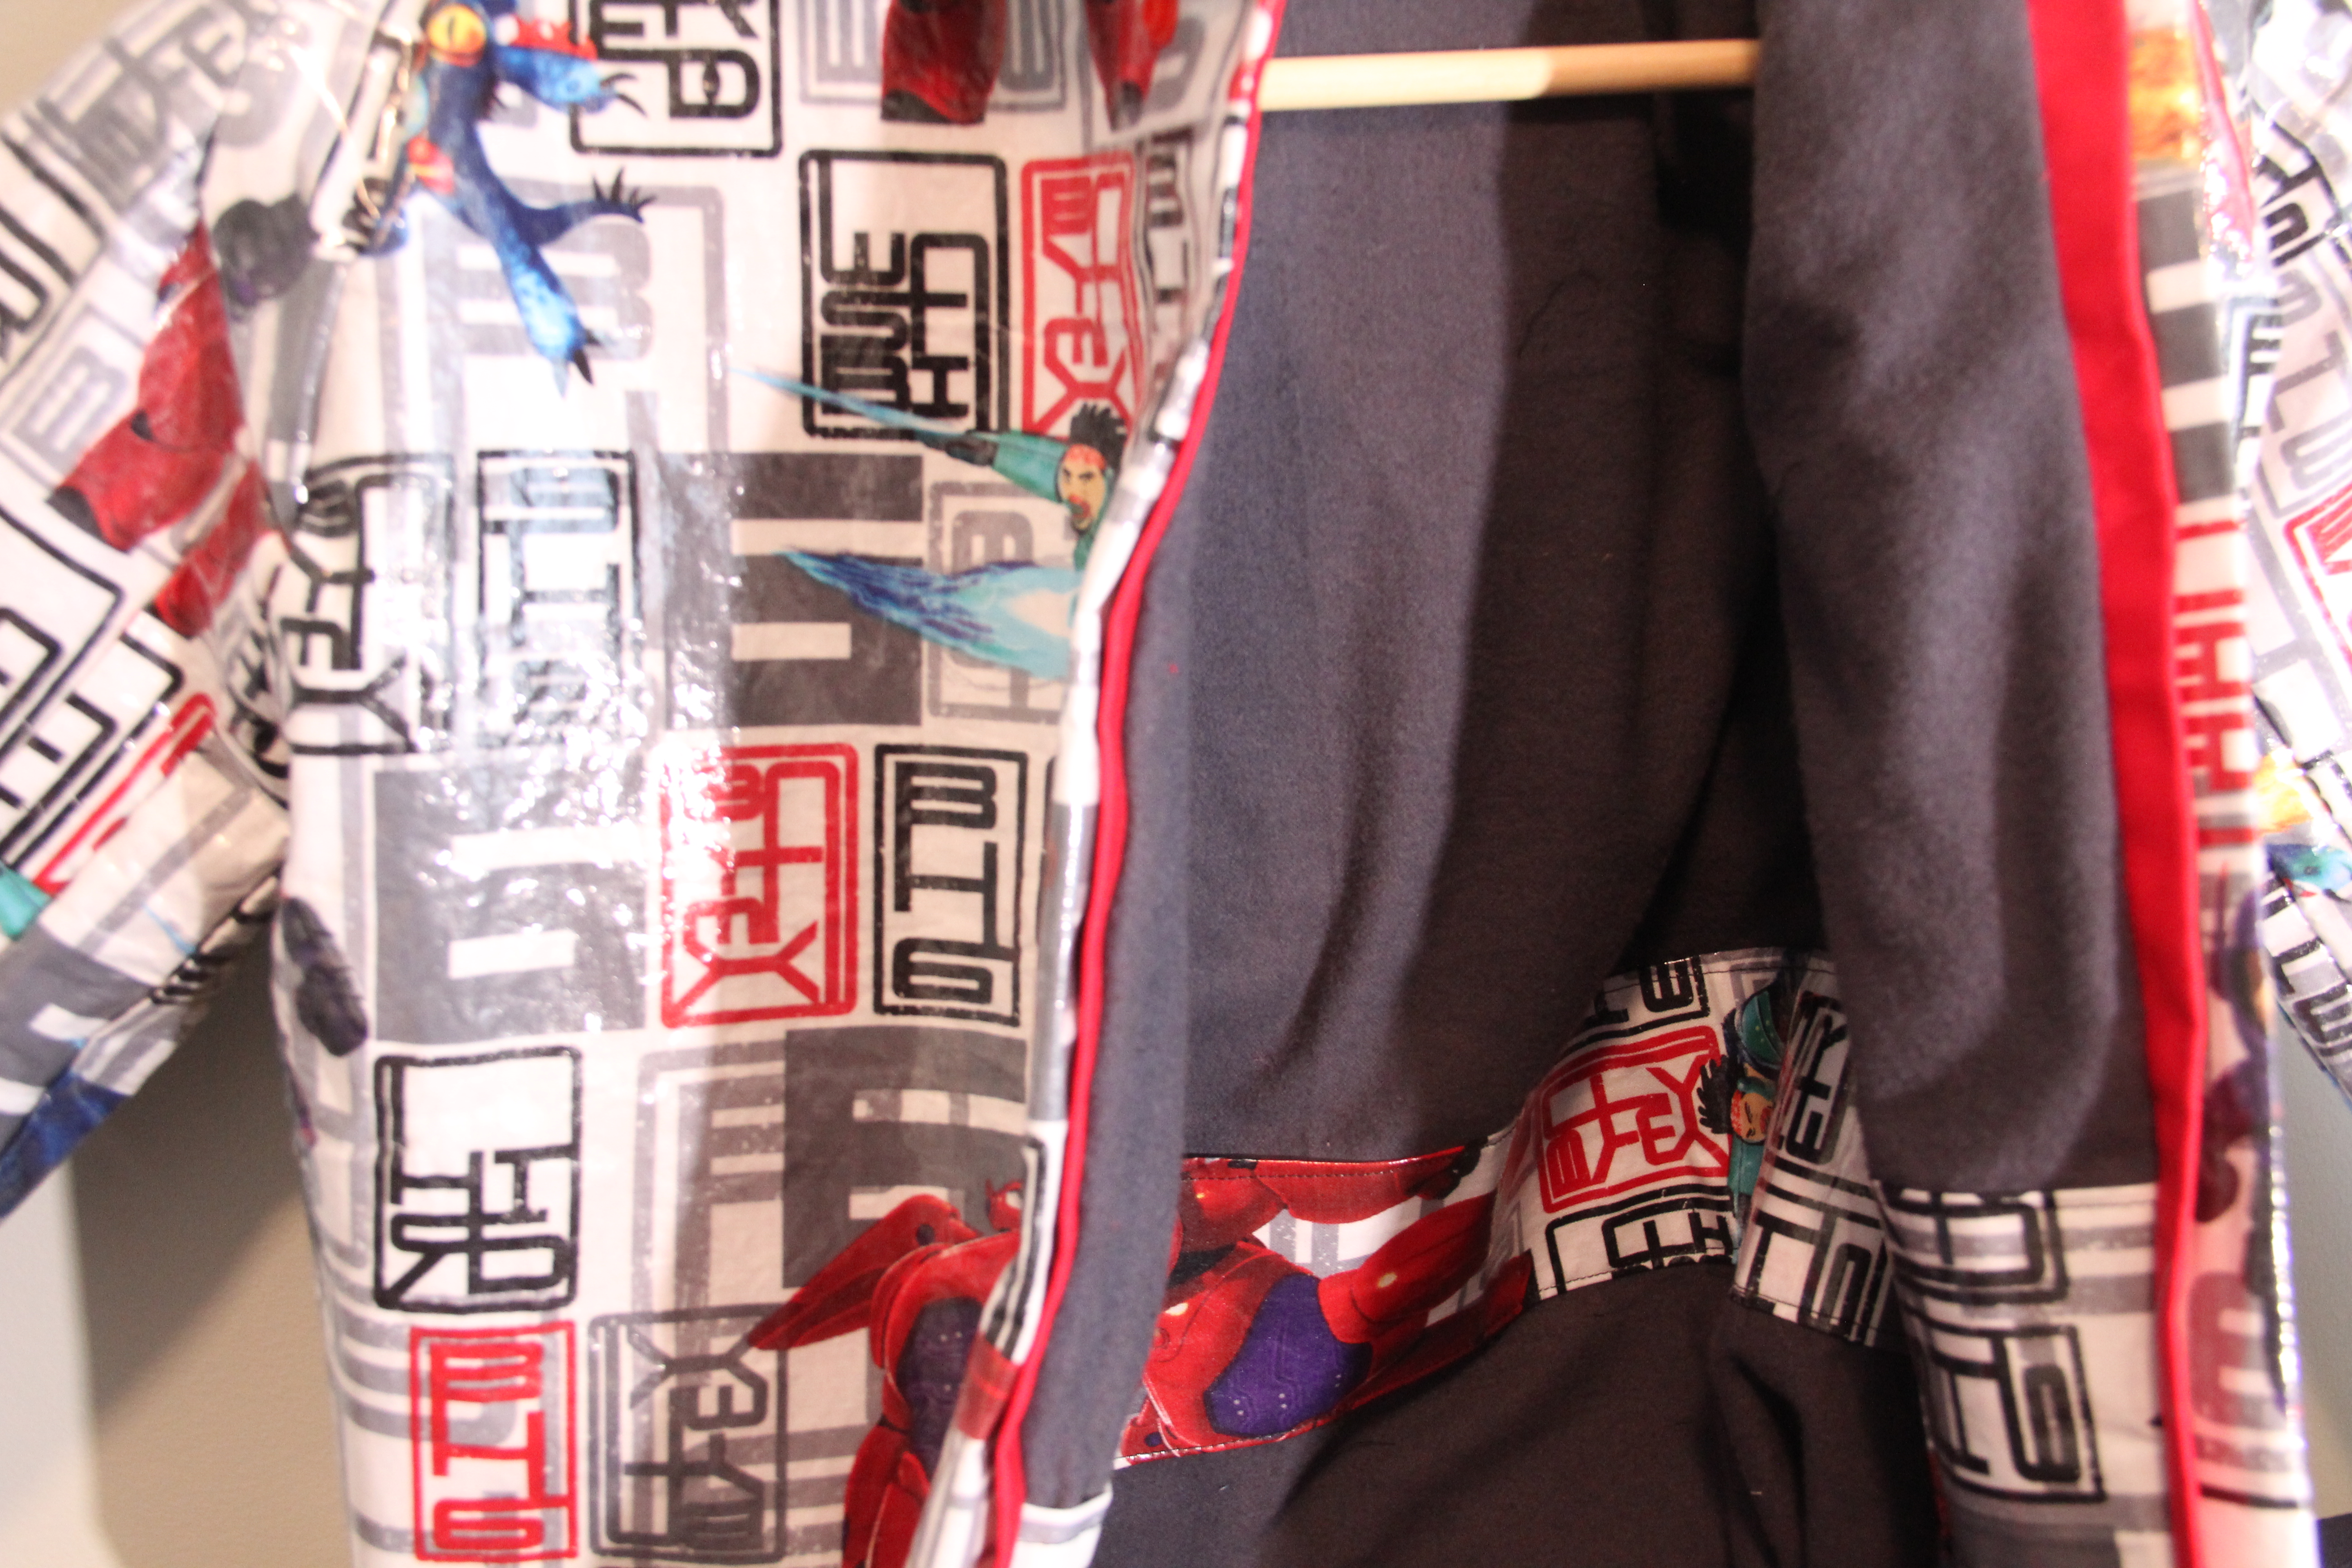
Not a bad look, but the sizing wasn’t quite right. And of course, the devil is in the details. I still have to put in the finishing touches like the snap closures and do some clean up.
My oldest son is a size 7/8. The youngest is a size 4/5. This jacket ended up being about a 6/7. That gives me enough time to work on it while my youngest son grows into it, right?
Happy Sewing!!


Leave a comment